How to display results and labels in one plan view for different building elevations?
To display results and labels in a single plan view for buildings with different elevations, you need to create a custom plan view positioned at an elevation that includes the rooms in all of those buildings.
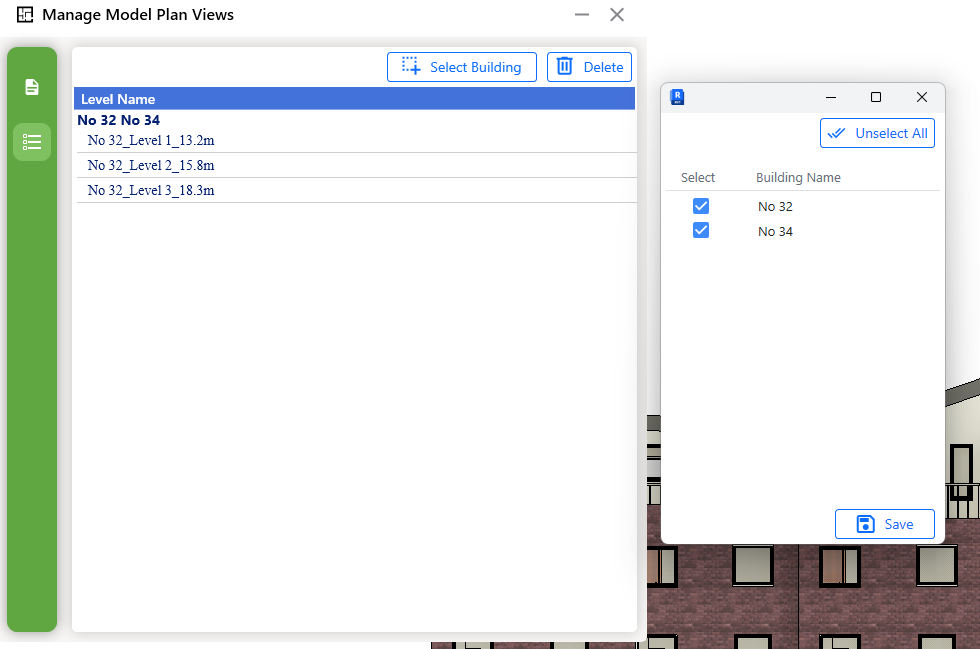
To achieve this, the software provides a tool called “Manage Model Plan Views”, which allows you to create floor plans in a structured and efficient manner within our plugin. Please follow the steps below:
- Go to Utility Tools.
- Click on Manage Model Plan Views.
- Adjust the Tolerance value in the dialog. Here, tolerance value represents the difference between the elevations of the selected buildings.
- Click on the Select Building button.
- In the building selection dialog, choose the relevant building names.
- The available plans that can be created will be displayed in the Manage Model Plan Views dialog.
- Click on the Create Floor Plan button.


How to view results in plan views?
To view the results:
- Go to Utility Tools.
- Click on Open Named Host Level Floorplan.
- A new dialog will appear, allowing you to select a Room, Window, or Amenity.
- After selecting one of these options and choosing the relevant item, the nominated plan view will open, displaying the corresponding result.
How to delete plan views?
Plan views created using Manage Model Plan Views are registered in the database. Therefore, manually deleting them from the Project Browser does not fully remove their records. To completely delete a plan view, please follow the steps below:
- Go to Utility Tools.
- Click on Manage Model Plan Views.
- In Manage Model Plan Views dialouge, click on the icon with three horizontal line (know as Manage Plan View).
- Next, Click on the Select Building button.
- In the building selection dialog, choose the relevant building names.
- Click on the Delete button.